Baking Tray
Parchment Paper
Mixing Bowl
Measuring cups and spoons
Wooden Spoon or Silicon spatula
Oven preheated to 325F
Mixing Method
Soften Coconut oil with a spoon till creamy. Do not melt.
Add Baking Powder, Xanthum Gum and Coconut Sugar, stir until creamy.
Add Honey, Ginger and egg, stir until all combined
Add Flour and stir until has formed a soft sticky dough.
Cooking Method
Use 2 teaspoons to form oval shaped lozenges and spoon onto baking tray covered with parchment paper
Place in oven and cook for 15 minutes until golden brown
Cool on tray then store in an airtight container
These are not really pancakes, nor yet crepes, but fall somewhere in between as ‘pancrepes’. The main difference is in the consistency of the batter and the number of eggs. I also serve these as sweet rather than salty. Most recipes call for salt, which I leave out altogether, or call for both baking soda and baking powder. I just use a teaspoon of baking powder for the whole mix, bringing the whole down to a fraction of the salt found at restaurants. You can leave the egg out if you like – I like the flavor it adds. Same for the whipping cream. You can use just milk, or milk and water to make a thinner recipe.
Pancake crepes ‘pancrepes’ with maple syrup and lemon
Ingredients
2 cups of flour 1/3 cup of baking sugar (fine) 1 cup milk 1/3 cup whipping cream 1 egg 1 teaspoon baking powder Butter for the pan Maple syrup and ‘true lemon’ crystals or lemon juice
Preparation
Sift flour and baking powder a couple of times to combine Combine with the sugar Make a well Pour milk into the well, mixing the dry into the wet to avoid lumps Keep pouring the milk in a little at a time until all combined. Reserve some milk. Pour in the cream and mix in with a fork or knife Add the rest of the milk (you can add more to make the mix thinner if you like) Rest the mixture in the refrigerator for half an hour or so before cooking Put it into a container with a spout so you can pour it Heat a non stick skillet until a drop of water sizzles Add a little butter to coat the pan Keep the butter handy to coat the spatula Pour small circle into the pan and tilt the pan around to make the circle larger (4-5″) When first bubbles form (count 15) turn it over (count 15) Makes around 25 ‘pancrepes’ 5 minutes to mix the batter | wait half an hour | 15 minutes cooking time (you can make the batter the evening before and cook these up for breakfast) Put remainder into a container and microwave for 15 seconds for each plate of 3 Makes an easy stand-by snack if you are busy around the house
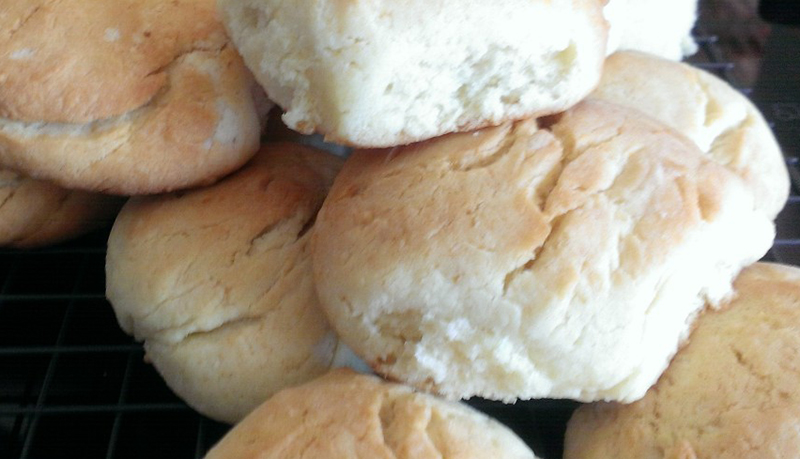
My sister taught me this recipe when she was here over the summer. In Australia we call these ‘scones’ and in America, these are often called ‘biscuits’. It’s a quick recipe that relies on the ‘shortness’ of the pastry by way of butter. In this case, it is low salt, and low sugar, but not low in fat, just so you know. The buttery taste is the point, in this case. Something that satisfies the craving for fat, but without blowing out the salt requirement. Giving in to cravings occasionally is a good way to stick to the low-salt diet.
Ingredients
2 cups of flour
2 tablespoons flour for coating the final mix
1/2 cup baking sugar (or splenda, xylitol, date sugar, your choice)
1 egg (optional)
1 teaspoon baking powder
1 cup milk (or substitute)
1 stick of butter
Optional
Chopped dates, apricots, sultanas, raisons
Method
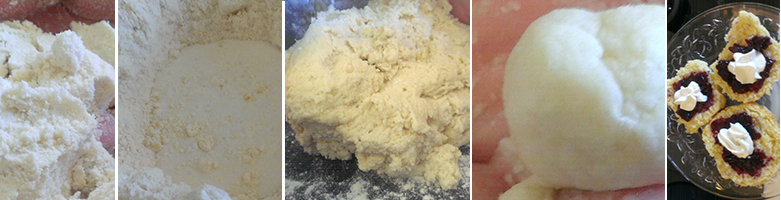
Combine the dry ingredients – flour, sugar, fruit
Soften the butter and combine by hand until it makes ‘crumbles’
Make a well in the middle
Add the milk (Colleen says the milk should be 1/3 up the well so vary accordingly. I just pour it by eye)
Combine by hand until it sticks together
(yes, you can add extra flour or milk to make it sticky but maleable but do not overwork it)
Form into a rough square about an inch thick
Cut with a knife into 12-16 pieces
Rough form with palms and put onto parchment covered baking sheet about 1/2 inch apart
Put into pre-heated oven at 400 degrees farenheight for 18-22 minutes until golden
Done when they spring back
Cool for 5 minutes and enjoy!
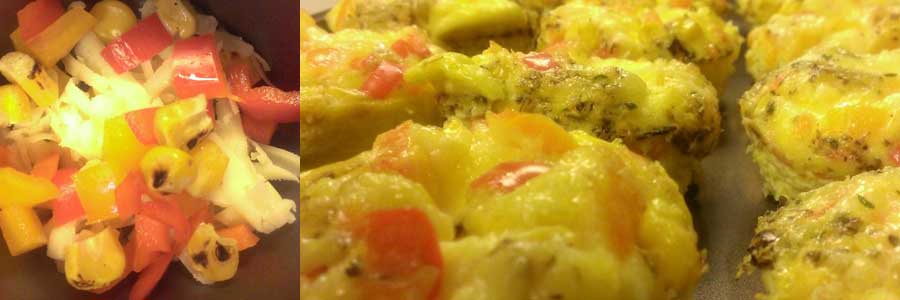
In the morning, I like easy better than coffee. This quick egg recipe allows me to prepare snack meals for the week and grab them to go. All I need is a muffin pan, a dozen eggs and some imagination. Other ingredients are seasonal, like fire-roasted corn, snap peas, sweet peppers or gem tomatoes. The recipe makes a dozen tiny frittata that are delicious both hot or cold.
Ingredients
One dozen eggs
Cheese – shredded
Optional vegetables – whatever is fresh – finely chopped
sweet onions
sweet tiny peppers
fire roasted corn
shelled sweat peas
mushrooms
summer squash
zucchini
potatoes or sweet potato
Enough liquid to make up 800ml total batter water or cream, both work
Garlic powder 1/4 teaspoon
Pepper to taste
A pinch of garam marsala or savory herbs
Making the recipe
Pre-heat oven to 375 degrees
Crack the eggs into a large measuring beaker
Add enough liquid (water or cream) to make 800mls
Beat the mixture and add the spices, set aside
Prepare a non-stick muffin pan with butter or oil (I like butter)
Grate the cheese and add a desert spoon to each muffin cup
Chop the vegetables and sprinkle over the cheese, until cups are 2/3 full
Give the egg mixture a last stir (herbs may have settled) and add to the muffin cups
Bake for 22-25 minutes
They are done when risen and lightly springy on top.
Savory bites
I usually make this in a large muffin tin and the recipe makes 12. However, my sister tells me that mini muffin pans make cute bites that are perfect for afternoon tea. Share the recipe link on facebook and follow us to get more fun recipes.
Store the indivual frittata in an air-tight container or in small bags ready to grab for work. I like to heat them and serve in rolled flatbread. My thanks to Jane for introducing me to the idea of the frittata and providing a couple dozen when I was visiting my sweetie in the hospital. These little protein bombs kept me going.
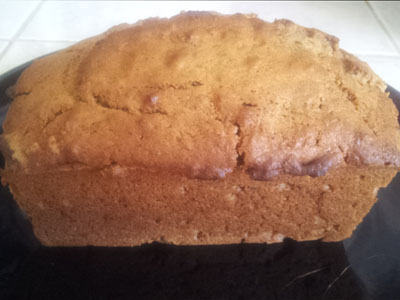
We all have foods that invoke those halcyon days of our youth, warm comfort food that we ‘go to’ to make bad days better. Date loaf is one such food for my sister Ria, and in the past months all she wanted was some Date Loaf like we used to eat when we were kids. This recipe has been reverse engineered from memories of what it should taste like. When made using low sodium baking powder and sweet butter each slice averages 100mg sodium.
For the best results there are a couple of things to do first.
Date mix
Step One: the flavour is better if you can soak the dates overnight in the water and molasses. If you dont have time the day before – boil the water and pour over the chopped dates, place in freezer until cool (about 1 hour) use this time to do step 2. Step Two: Sift General purpose (plain flour) with the low sodium baking powder 6 times using a large strainer or sieve. Step Three: Preheat oven to 375F or 180C then grease and line the base of your loaf pans.
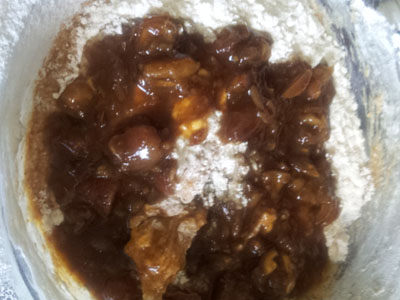
Mixing the cake
Cream the butter and sugar with a fork, add eggs and stir till mixed
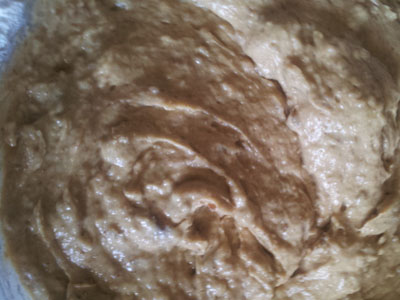
Add 1/3 date mix and sieved flour to butter/sugar/eggs, stir until a batter, continue to add dates & flour till all mixed in, stir 3mins for good measure
pour finished batter into prepared loaf tins. Cook 25 – 45 mins till cake springs back when lightly touched
Ingredients: Measurements in imperial and (metric)
3 cups General Purpose Flour (Plain)
6 level teaspoons Low Sodium Baking Powder (less than 450mg/tsp)
2 Sticks sweet butter (225gm unsalted butter) you cannot use margarine for this recipe as it
contains too much salt
½ cup Brown Sugar
½ cup Date Sugar
1/3 cup Molasses
4 Eggs (large/70gms per egg)
12 oz Chopped Dates (400gm)
Water (enough to cover dates in a measuring cup to 800ml total volume)
Photos and recipe copyright by Colleen (tummyluv) in Ria’s kitchen.
I love the idea that we live in a time when we can get any produce at any time, at least hypothetically. Yet recently, I’ve come to notice that foods that are forced to grow out of season just don’t taste as good. The out-of-season foods may be uniform in size and shape, and they are made to pack and travel well; that makes them reliable in a sense. Yet what is missing, for me, is the concentrated flavor and organic variation that makes the food visually and aesthetically pleasing. As an artist, I cannot imagine wanting to draw a perfect apple or raspberry; that would make for an artificial-looking image composition at best, more like wax than something edible. Apparently my taste buds feel the same way!
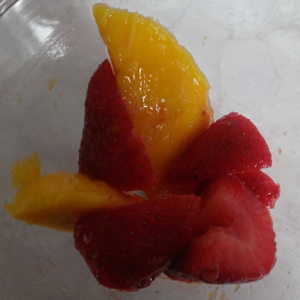
Lately, I’ve been making fresh fruit snacks from whatever fruit is in season, usually from local growers. Organic is a preference, where available, though a good wash removes most of the chemicals. I choose fruit that is just at, or nearly past, its peak, firm but starting to get a little soft. Ready to eat today or tomorrow is my general rule, and it has to be “smelly”, that is to say ripe. If there is no scent to the food, then I walk away. From May onwards, local farmers markets are opening in school parking lots and community centers, and that’s my favorite place to shop for fresh produce. It’s always good to learn something new from the grower, and the sensory experience of seeing the food and being amongst community members makes me feel connected. Being in the moment, and noticing what my body wants to eat is also part of the experience.
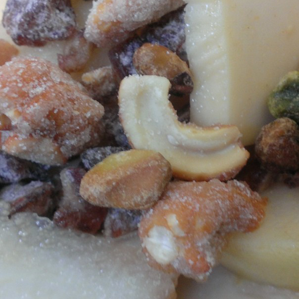
Balances of sweet and savory appeal to me most, things like pears with curry cashews and chopped dates, pistachios sprinkled over nectarines, accompanied by a sharp cheese (Beecher’s Flagship), some pickled onions, snappy crackers (Ritz baked). Here are some snacks I’ve enjoyed from March through May in Seattle.